Color channel swapping in Photoshop
 This is a little HOWTO (or tutorial) about swapping/inverting two color channels. I will swap the red and the blue color channel using Adobe Photoshop CS 3 to create a more “normal” looking picture with a blue sky on my infrared photo taken with my Nikon D80 and a Hoya R72 67mm IR-filter. I will not describe how to take a IR photo and I will assume you have access to such a filter and know how to use it properly.
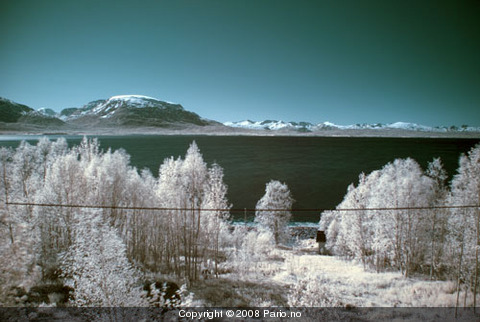
The result after this HOWTO should look something like this spring image taken some days ago. Not one of my best photos but it will do the job in this post.
- Open the IR photo file in Photoshop, presumeably a RAW file. In my case a Nikon NEF-file.
- Open the file whith the White Balance set “As shot”.
-
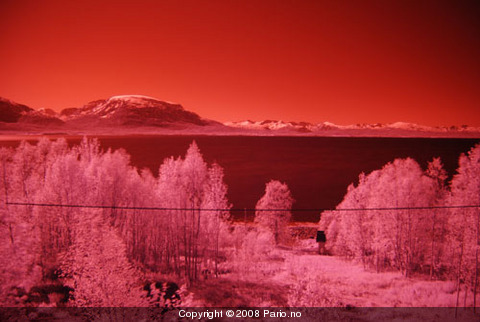
The photo might look something like this

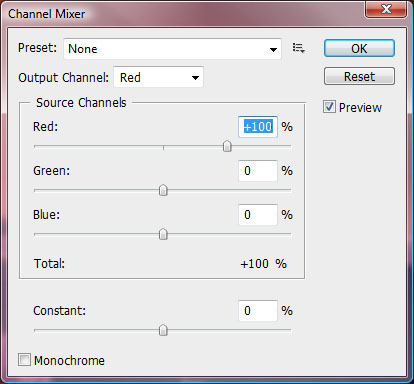
- Go to the menu and choose Image –> Adjustments –> Channel Mixer… Now you can change the Red Output Channel and set the value for Red to 0% and change the Blue value to 100%. On the Blue Output Channel you set the blue Source Channel to 0% and Red to 100%.

- Now we will let Photoshop adjust the levels and colors using the menu Image –> Adjustments –> Auto Levels followed by Image –> Adjustments –> Auto Color.
- The result image should look something like this

Thats all that is needed to swap or invert two color channels in Photoshop CS3.
This HOWTO has not been tested on on earlier versions of Photoshop but I guess the features I’ve used aren’t new.
Thank you, this was exactly what I was looking for, I just wanted to post since you were unsure about earlier versions of PS. It works exactly the same for Version 7.